
Why Getting Food Cost Right Is a Survival Skill
Food cost is the single most controllable variable in a restaurant's P&L. Labor is fixed. Rent is fixed. But food cost moves every time your supplier changes a price, every time a chef's portion gets generous, every time waste goes untracked.
The only way to manage it is to measure it — accurately, for every dish on your menu. A recipe cost card is how you do that.
Step 1: Open FoodTech.Guru and Tap "Create Recipe"
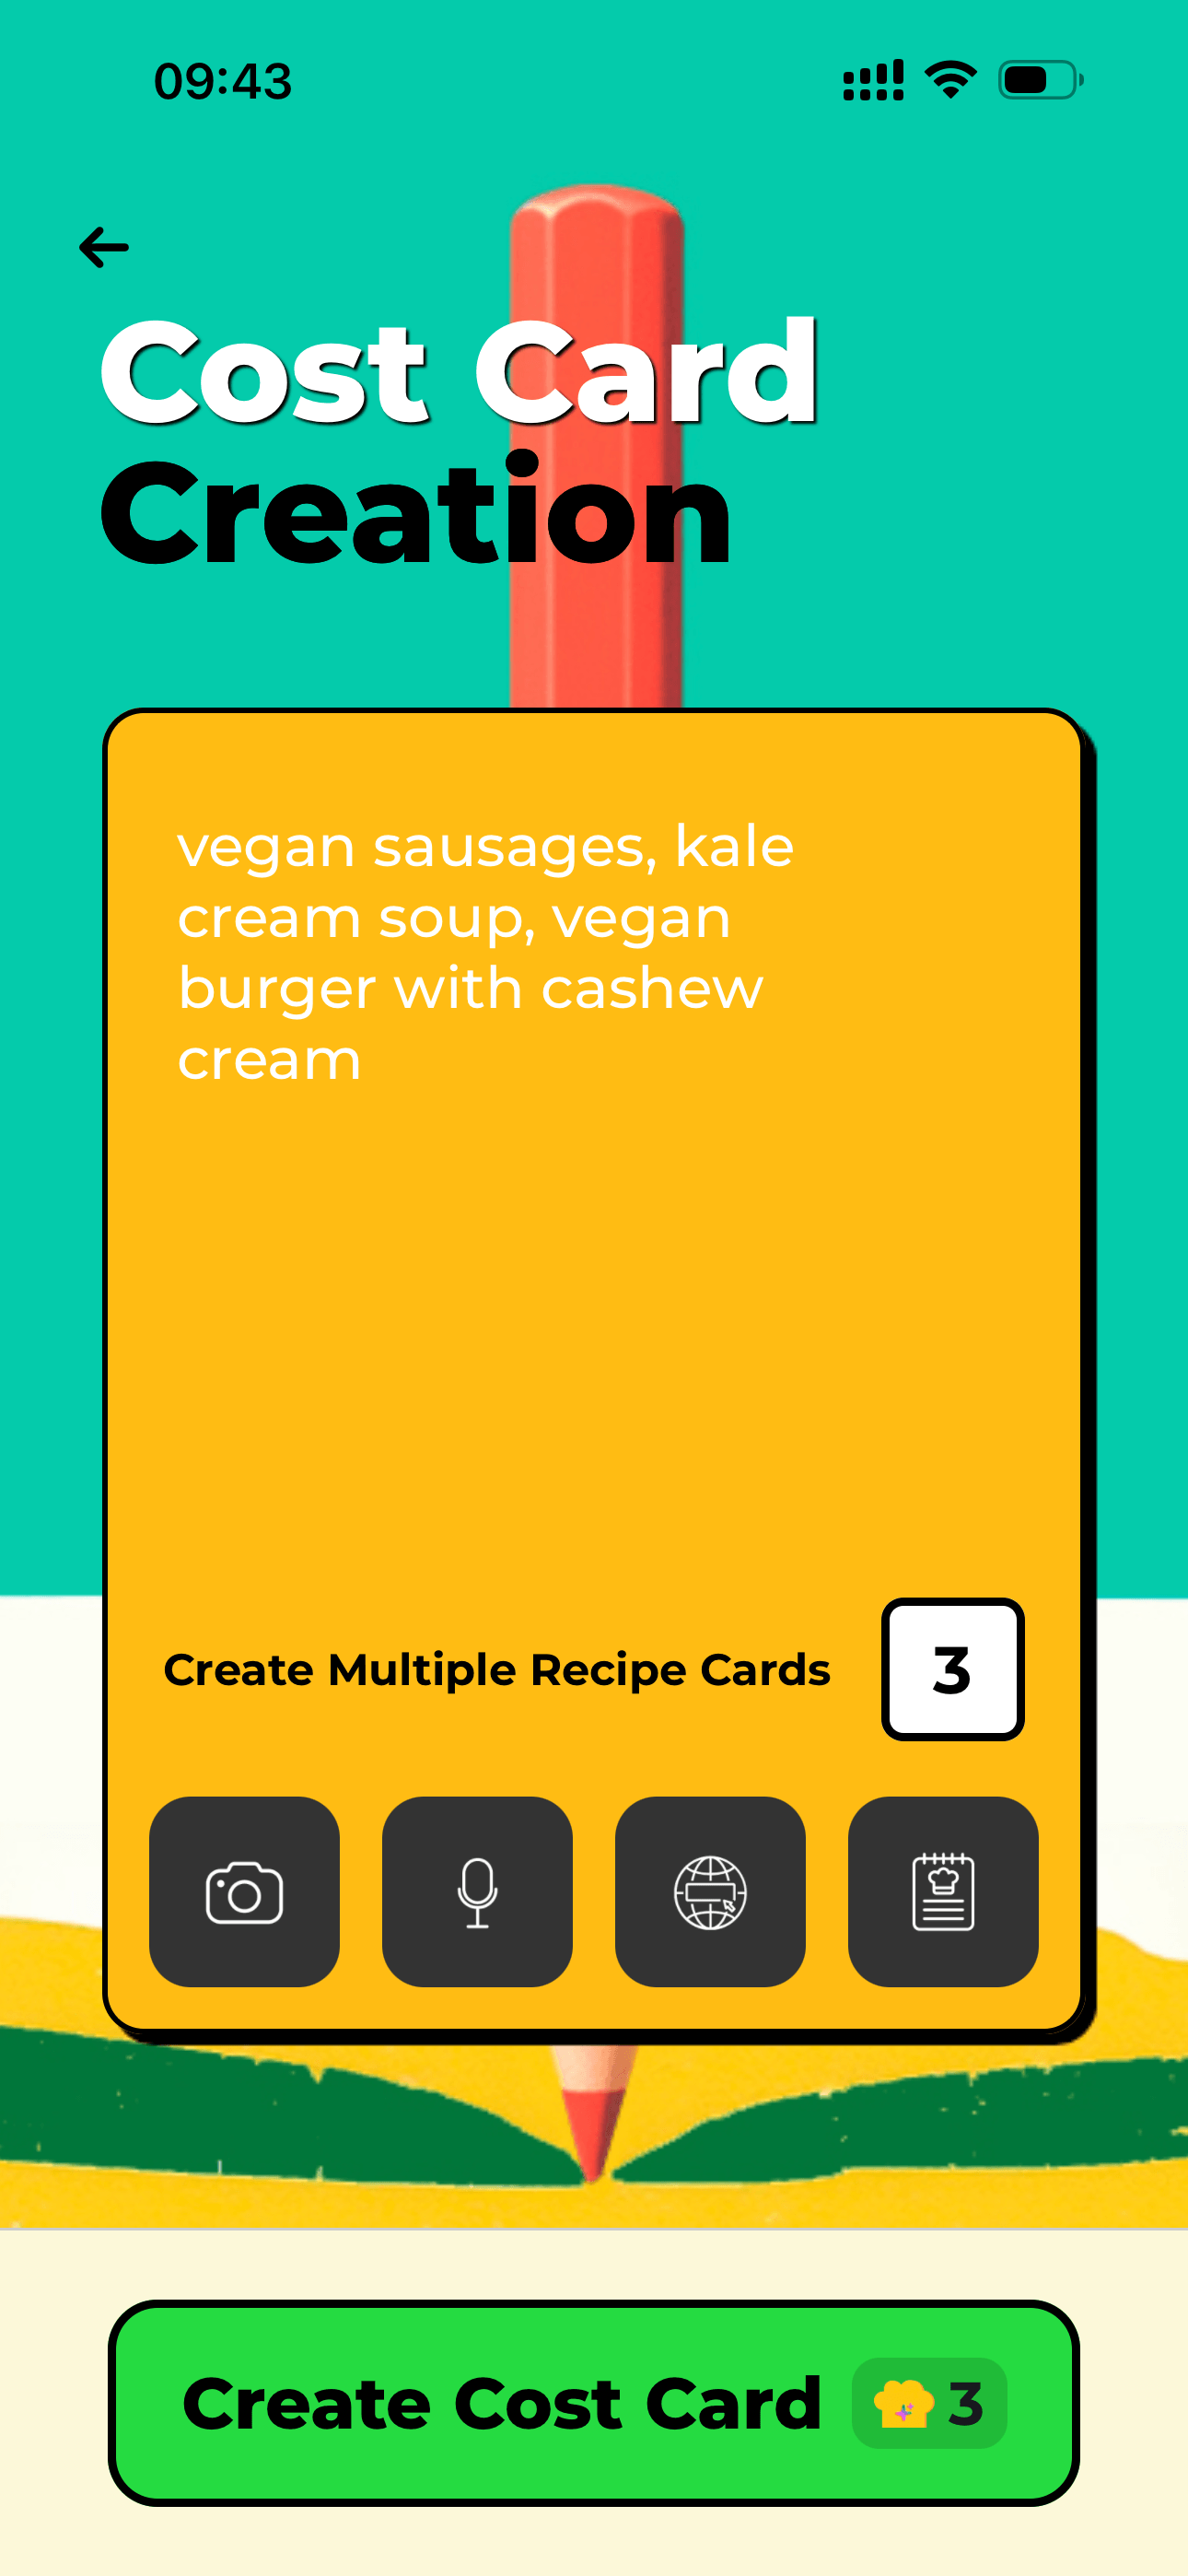
Start from text, photo, audio, or a link instead of rebuilding a spreadsheet by hand.
Launch the app and tap Create Recipe. You'll see five input methods. Choose whichever fits how you have your recipe right now.
Step 2: Input Your Recipe — 5 Ways
This is where FoodTech.Guru is different from any spreadsheet. You don't have to type anything manually if you don't want to.
Type or paste in any format — ingredient list, narrative, or structured recipe.
Dictate the recipe. Useful in prep when your hands are busy.
Point camera at any written recipe. AI reads and extracts all ingredients.
Paste any URL — the AI fetches and parses the recipe automatically.
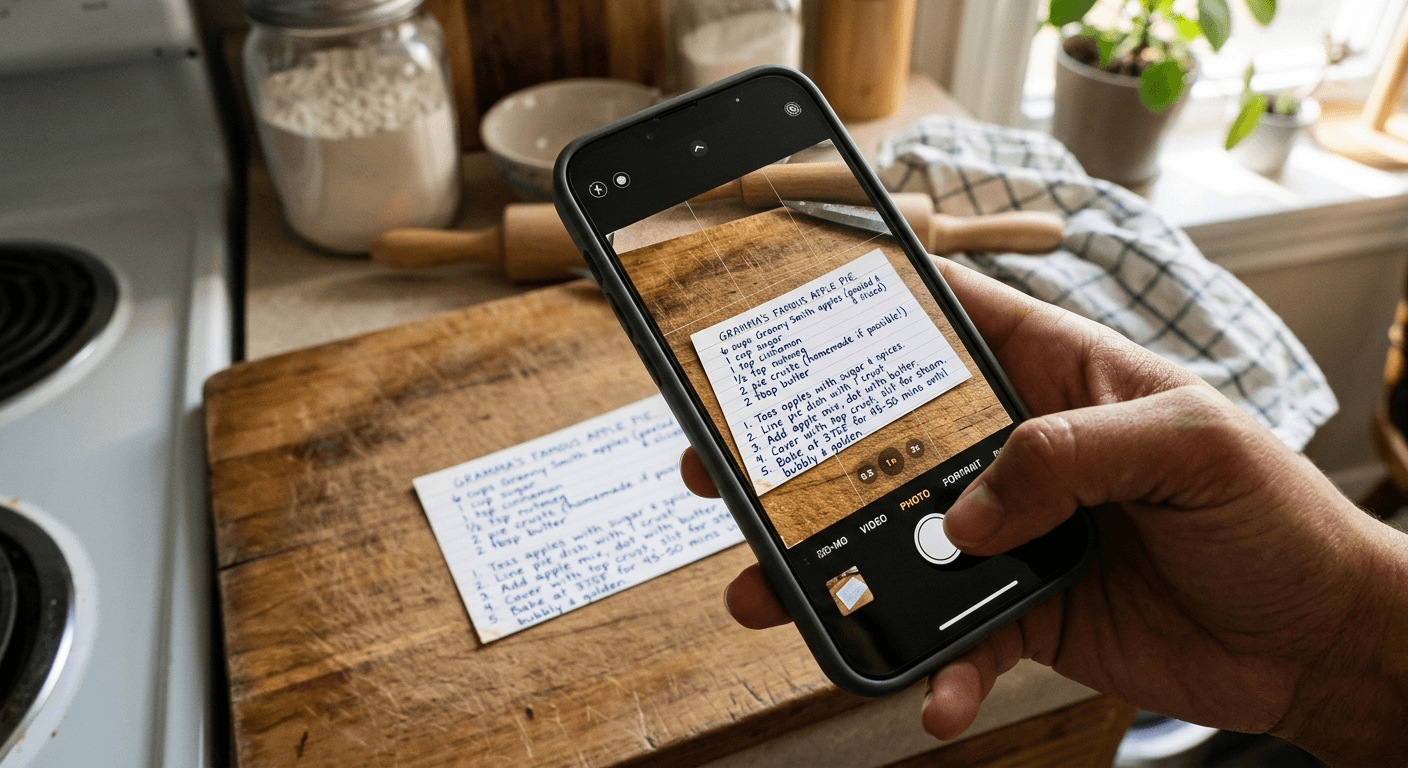
Photo input turns a handwritten or printed recipe into structured costing data.
Step 3: Review and Correct the AI Output
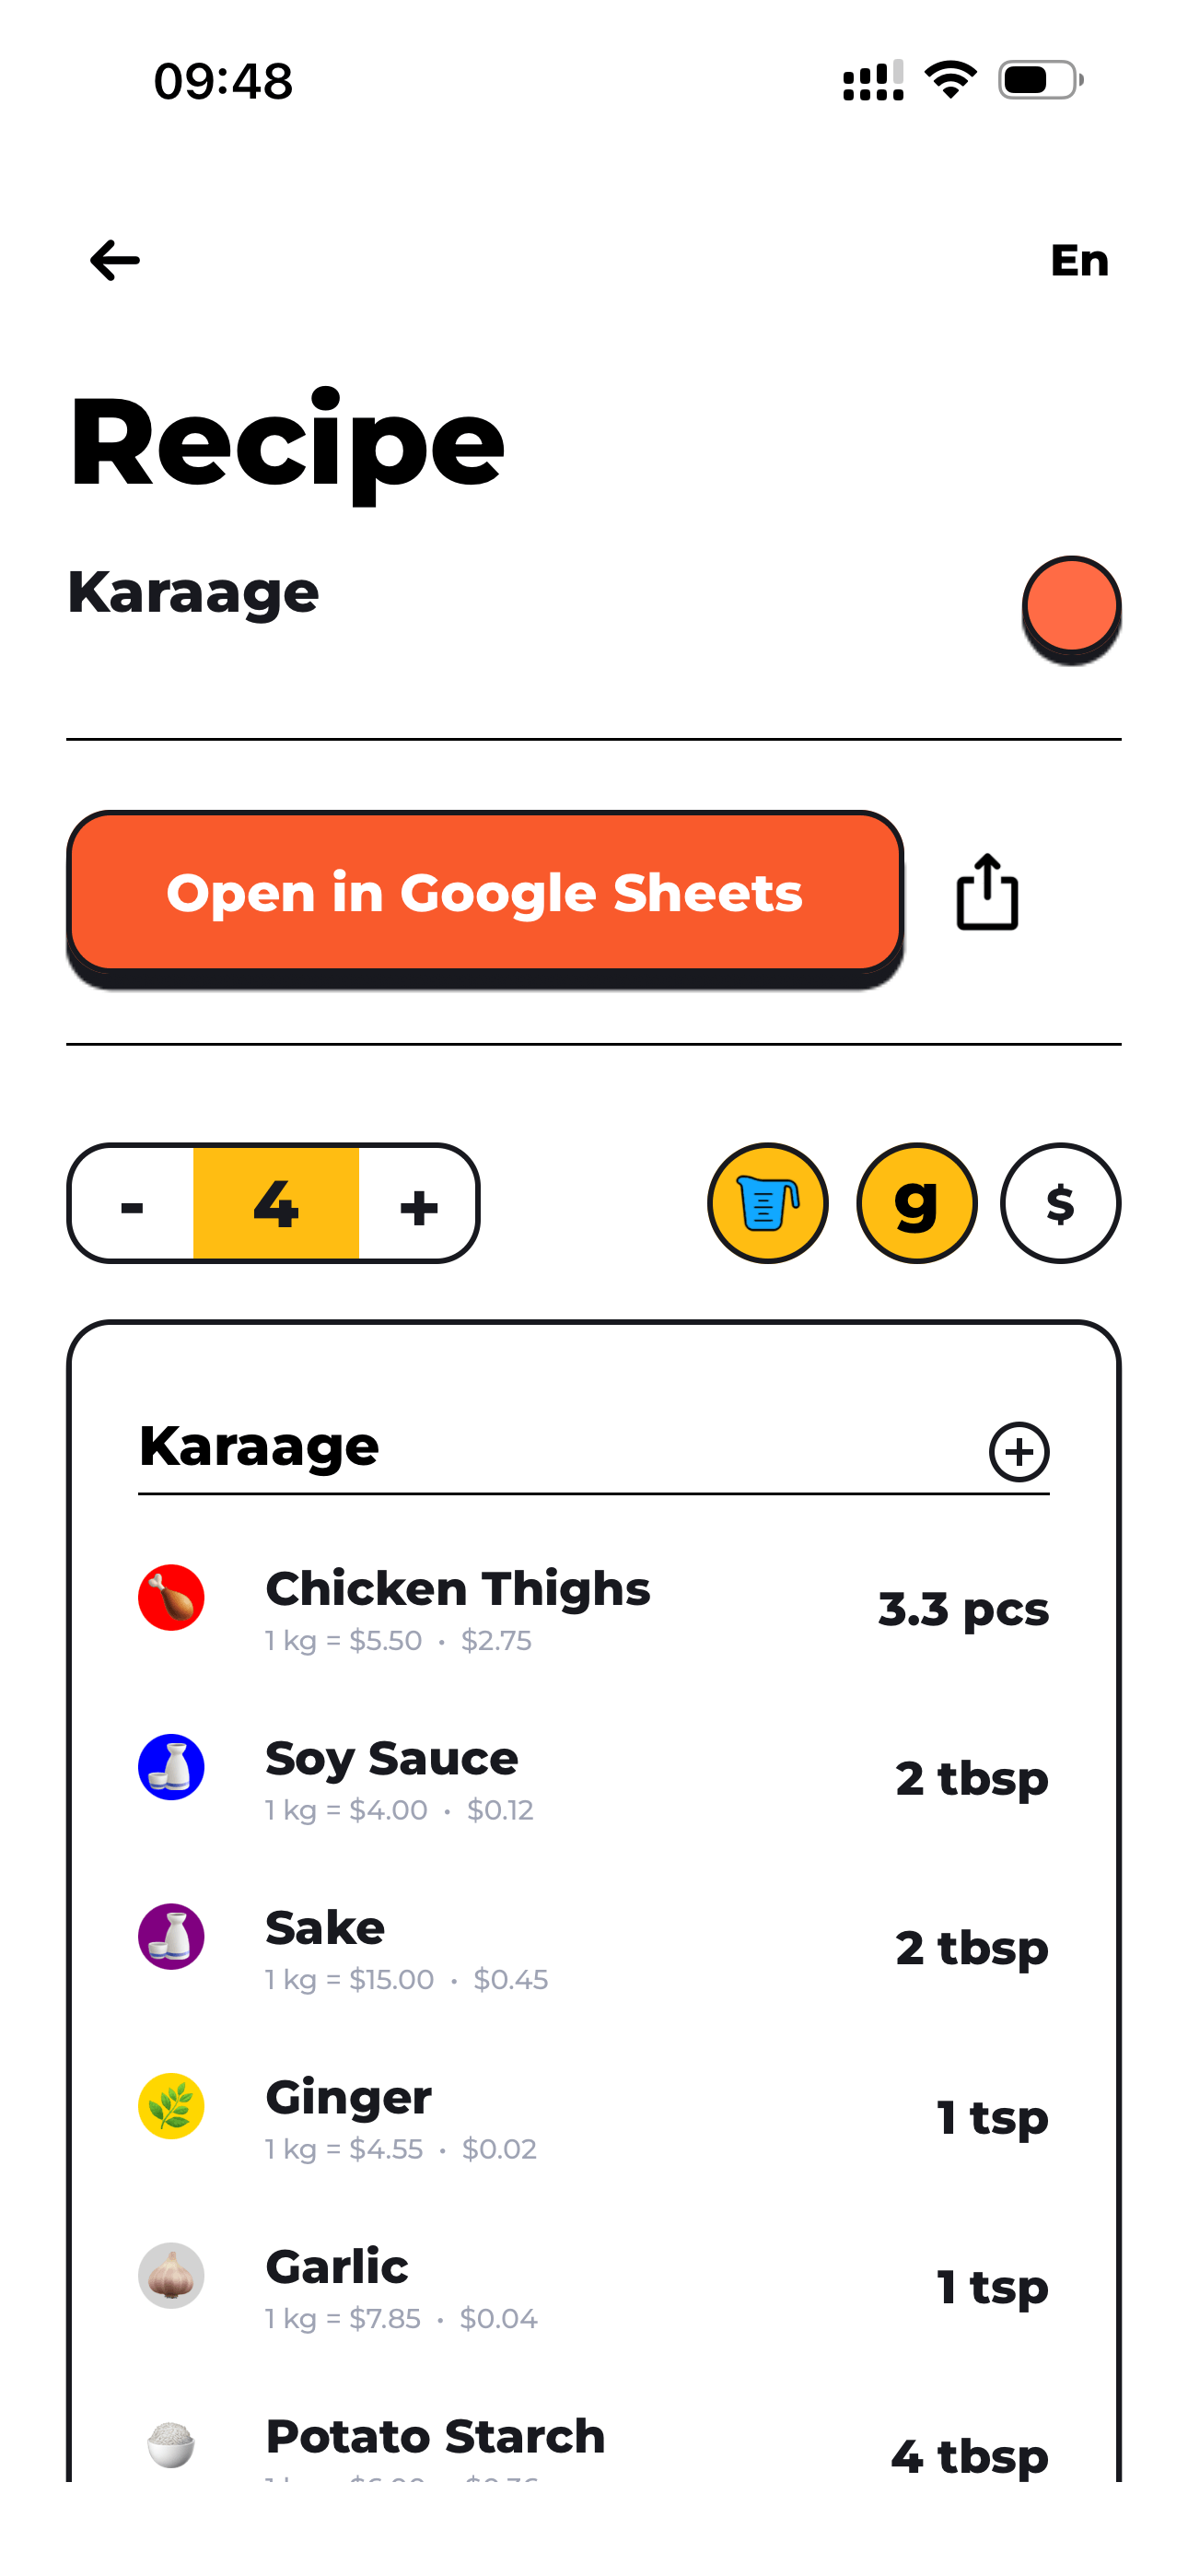
The completed recipe screen keeps ingredient, yield, and cost details in one place.
The AI generates a structured ingredient list grouped by preparation stage, with estimated weights, prep/cooking loss factors, and unit costs from your saved price list.
The editable fields are highlighted:
- Yellow cells — base recipe weight per ingredient (Column C)
- Yellow cells (Column I) — unit cost per kg from your supplier
- Blue cell (bottom) — actual serving weight
Step 4: Set the Serving Weight
Once cards are accurate, menu engineering can classify dishes from real margin data.
This is the most important single input. Enter your target portion weight and every number in the card updates — ingredient quantities, costs, yields. You can instantly model any volume or guest count.
Step 5: Review Your Completed Cost Card
| Metric | What it tells you |
|---|---|
| Cost per Serving | Exact ingredient cost for one plate |
| Cost per kg | Comparable benchmark across all dishes |
| Food Cost % | Cost per serving ÷ sell price × 100 |
| Gross Weight | What to order from your supplier |
| Cooked Weight | Actual yield after cooking |
| Nutritional data | Calories, macros, 11 vitamins per serving |
Step 6: Export to Google Sheets
Tap Export and FoodTech.Guru sends the complete cost card to Google Sheets — formatted, color-coded, and ready to share with your team, accountant, or investor. Change a supplier price in your price list and every affected cost card updates automatically.
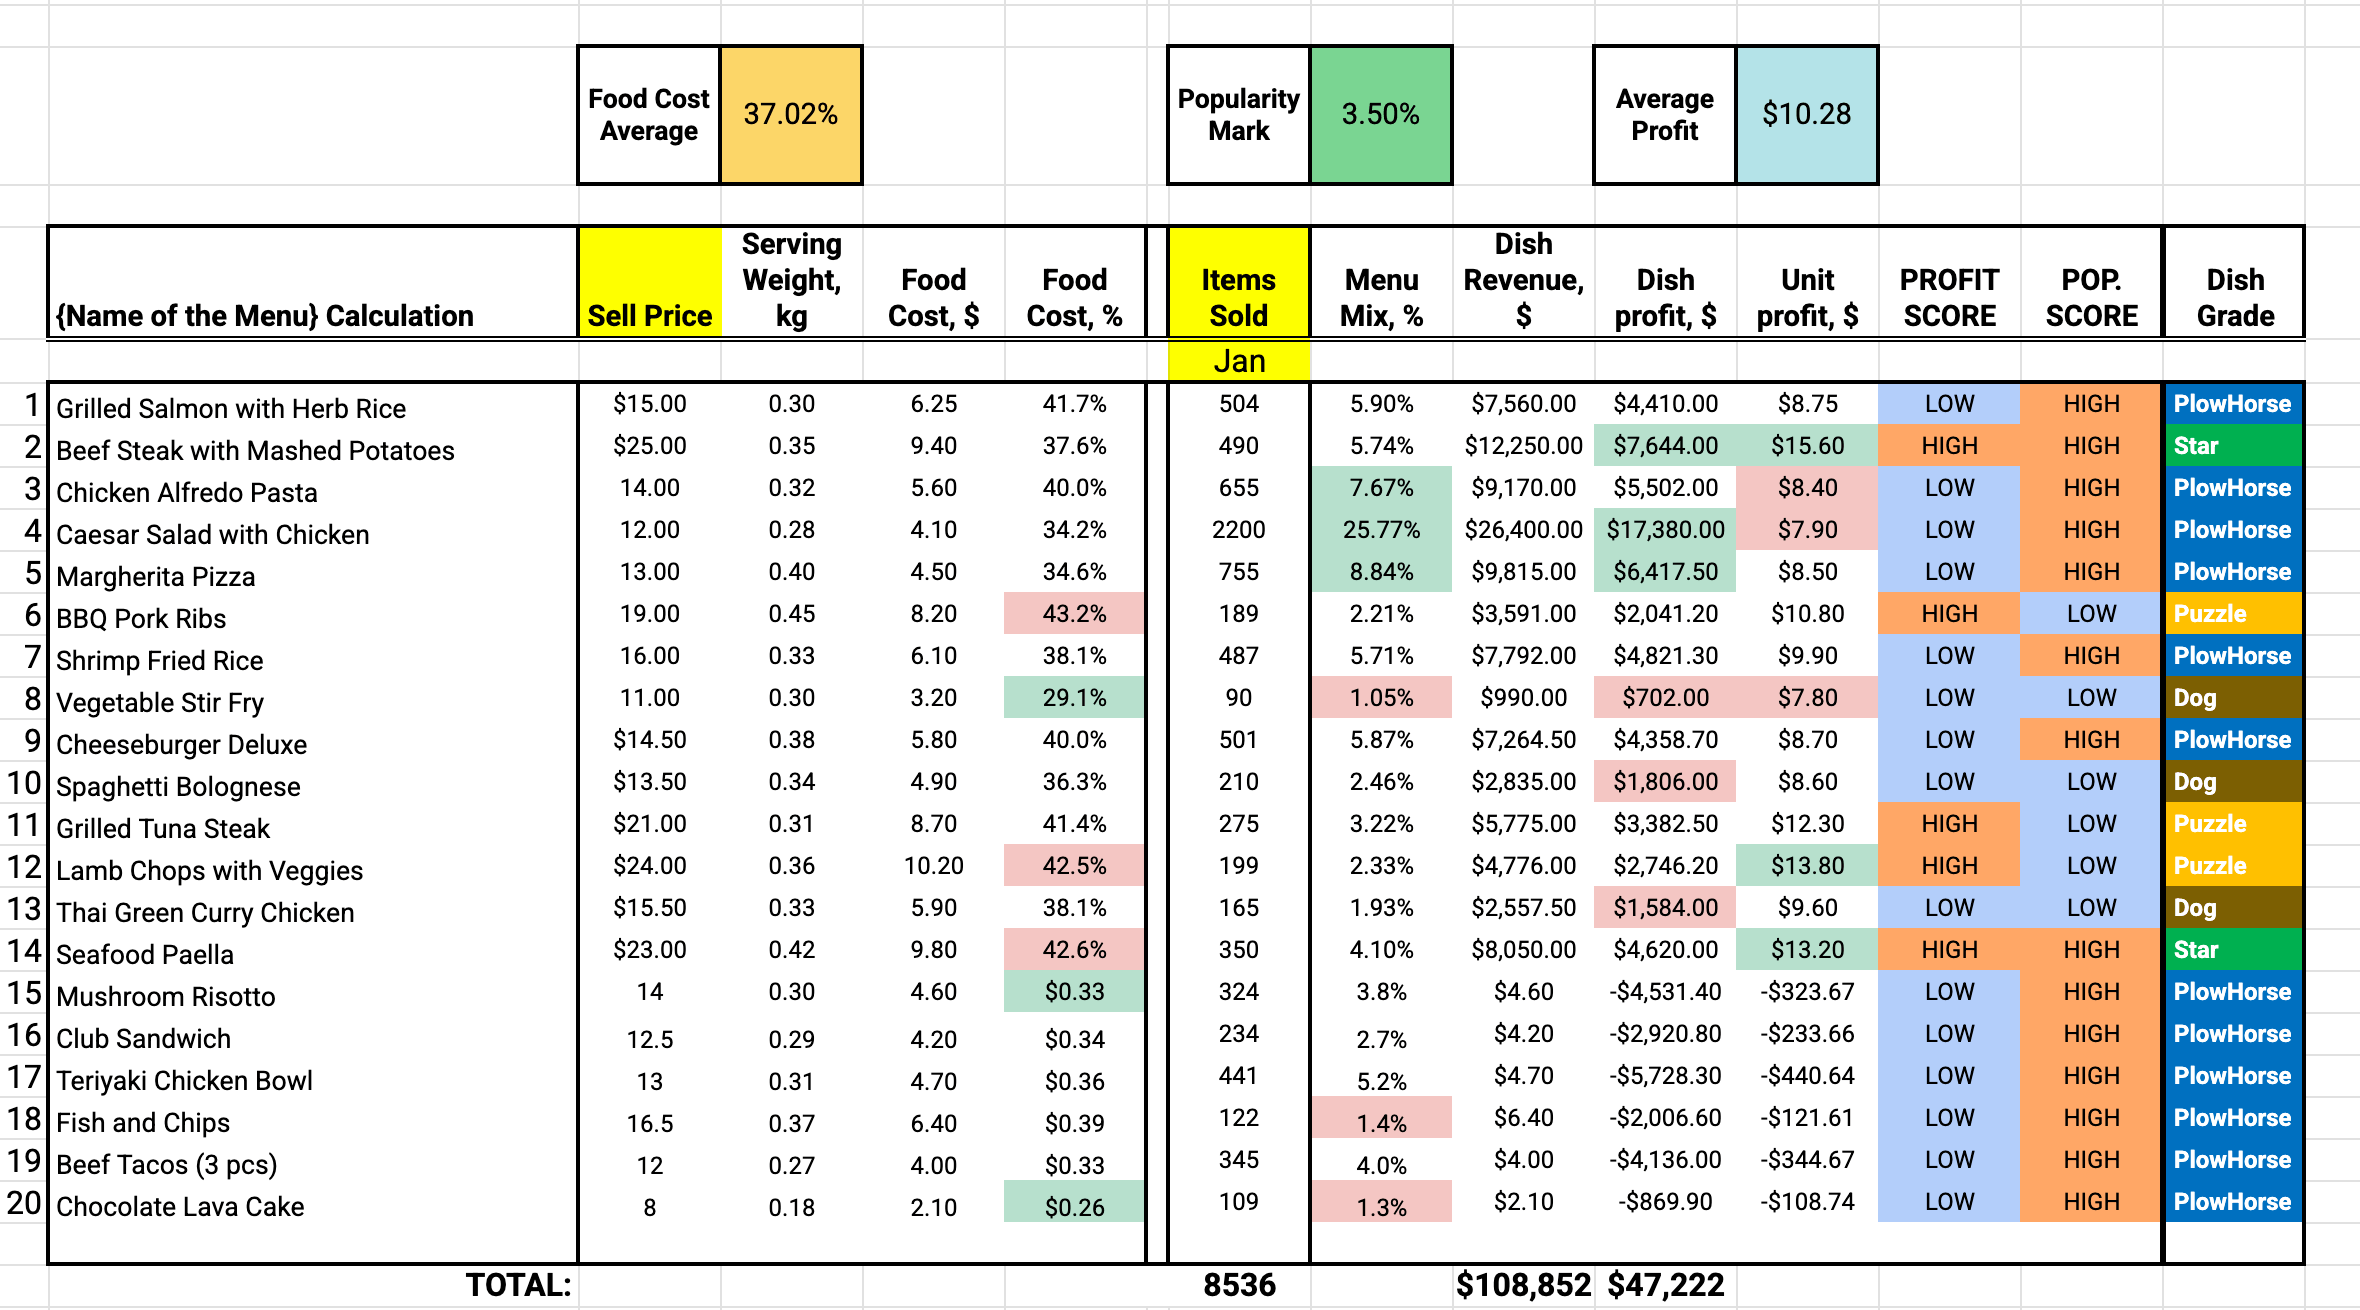
Step 7: Use the Cost Card for Menu Engineering
Once you have food cost % for every dish, you can run a full menu engineering analysis — classifying each dish as a Star, Plowhouse, Puzzle, or Dog to decide what to promote, reprice, or remove.
Common Mistakes to Avoid
- Using list price instead of invoice price. Always use the actual price on your supplier invoice.
- Ignoring portion drift. If chefs serve 180g instead of the costed 150g, your real food cost is 20% higher than the card says.
- Never updating ingredient prices. Set a monthly reminder to review unit costs.
- Building a card without loss factors. This alone can swing your food cost % by 5–15 points. See our guide to the perfect cost card.
The Time Comparison
| Method | Time per recipe | Includes loss factors | Nutritional data |
|---|---|---|---|
| Manual Excel | 45–90 min | ✗ | ✗ |
| Copy/paste template | 20–30 min | ✗ | ✗ |
| FoodTech.Guru | Under 2 min | ✓ | ✓ |
Ready to build your first cost card?